


This Ninja Creami Banana Ice Cream is made with no added sugar for a wholesome dessert. It’s so creamy that it’s laborious to imagine it’s dairy-free!
If you happen to’re already conversant in banana ice cream, making it in your Ninja Creami is like making it in reverse. As an alternative of utilizing frozen bananas, you’ll use recent ones!
This vegan ice cream is made with 4 easy elements with out counting on a pudding combine. For max sweetness, be certain that your bananas are ripe and have loads of brown spots on their pores and skin.
Elements You’ll Want
The mixture of ripe bananas and peanut butter provides this recipe an ultra-creamy texture.
You’ll be able to omit the peanut butter if you happen to want a nut-free recipe, however the texture is best whenever you embody it. (Almond butter, cashew butter, or sunflower seed butter could be swapped.)

This recipe combines 4 easy elements: a splash of vanilla extract, your favourite milk, and no added sugar. If you happen to want a sweeter taste, you’ll be able to sweeten it with a tablespoon of maple syrup or honey.
It’s simple to style the combination and modify as you go!
Milk be aware
I examined this recipe with almond milk, which has a watery consistency. You should utilize coconut milk for a creamier dairy-free possibility or use heavy cream if you happen to don’t want dairy-free ice cream.
Make Banana Ice Cream within the Ninja Creami
Add the ripe bananas, peanut butter, almond milk, and vanilla extract to a blender. Safe the lid and mix till clean. There needs to be no seen chunks of banana. (Alternatively, you can use an immersion blender and mix this instantly within the pint container.)
Pour the combination right into a Ninja Creami pint container. The quantity mustn’t go previous the max fill line. Safe the lid and place the container within the freezer for at the very least 24 hours.

As soon as the combination has been frozen strong, you should utilize it along with your Ninja Creami Ice Cream Maker.
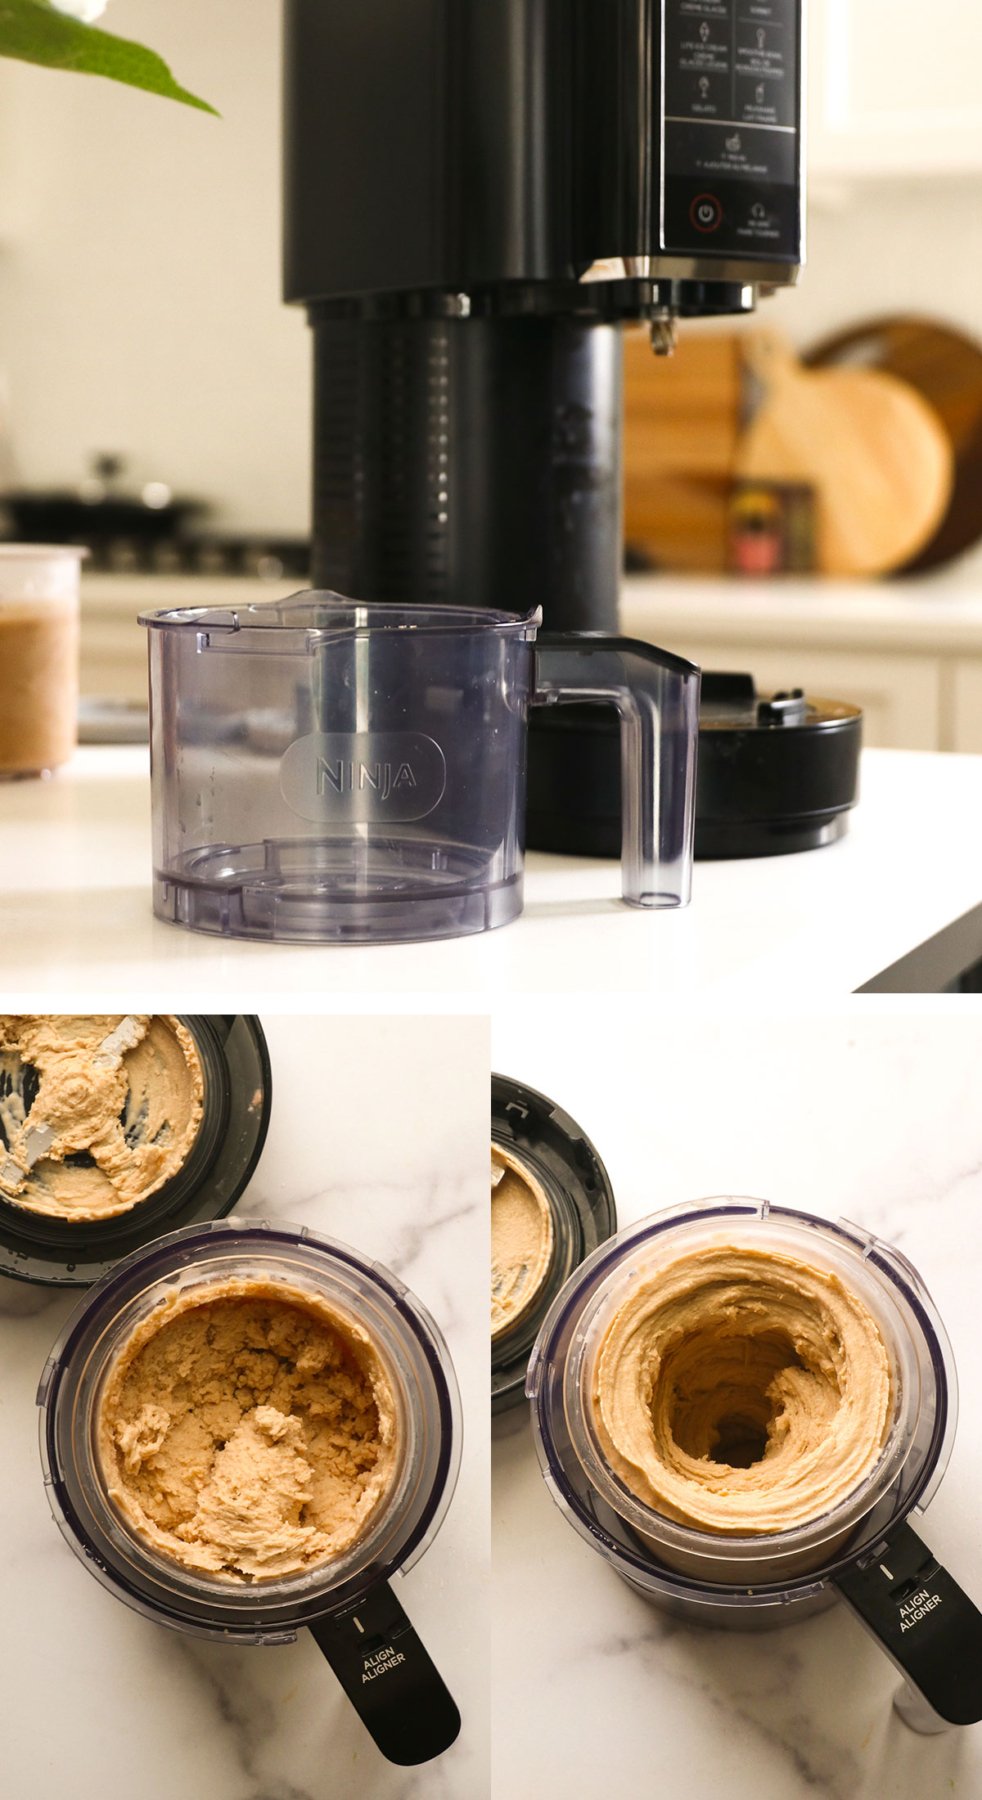
Take away the lid from the pint container and place it within the outer bowl of the Ninja Creami. Safe the lid with the blending blade hooked up, then click on the container into the machine.
Since this ice cream is primarily comprised of fruit, use the Sorbet setting for the primary mix.
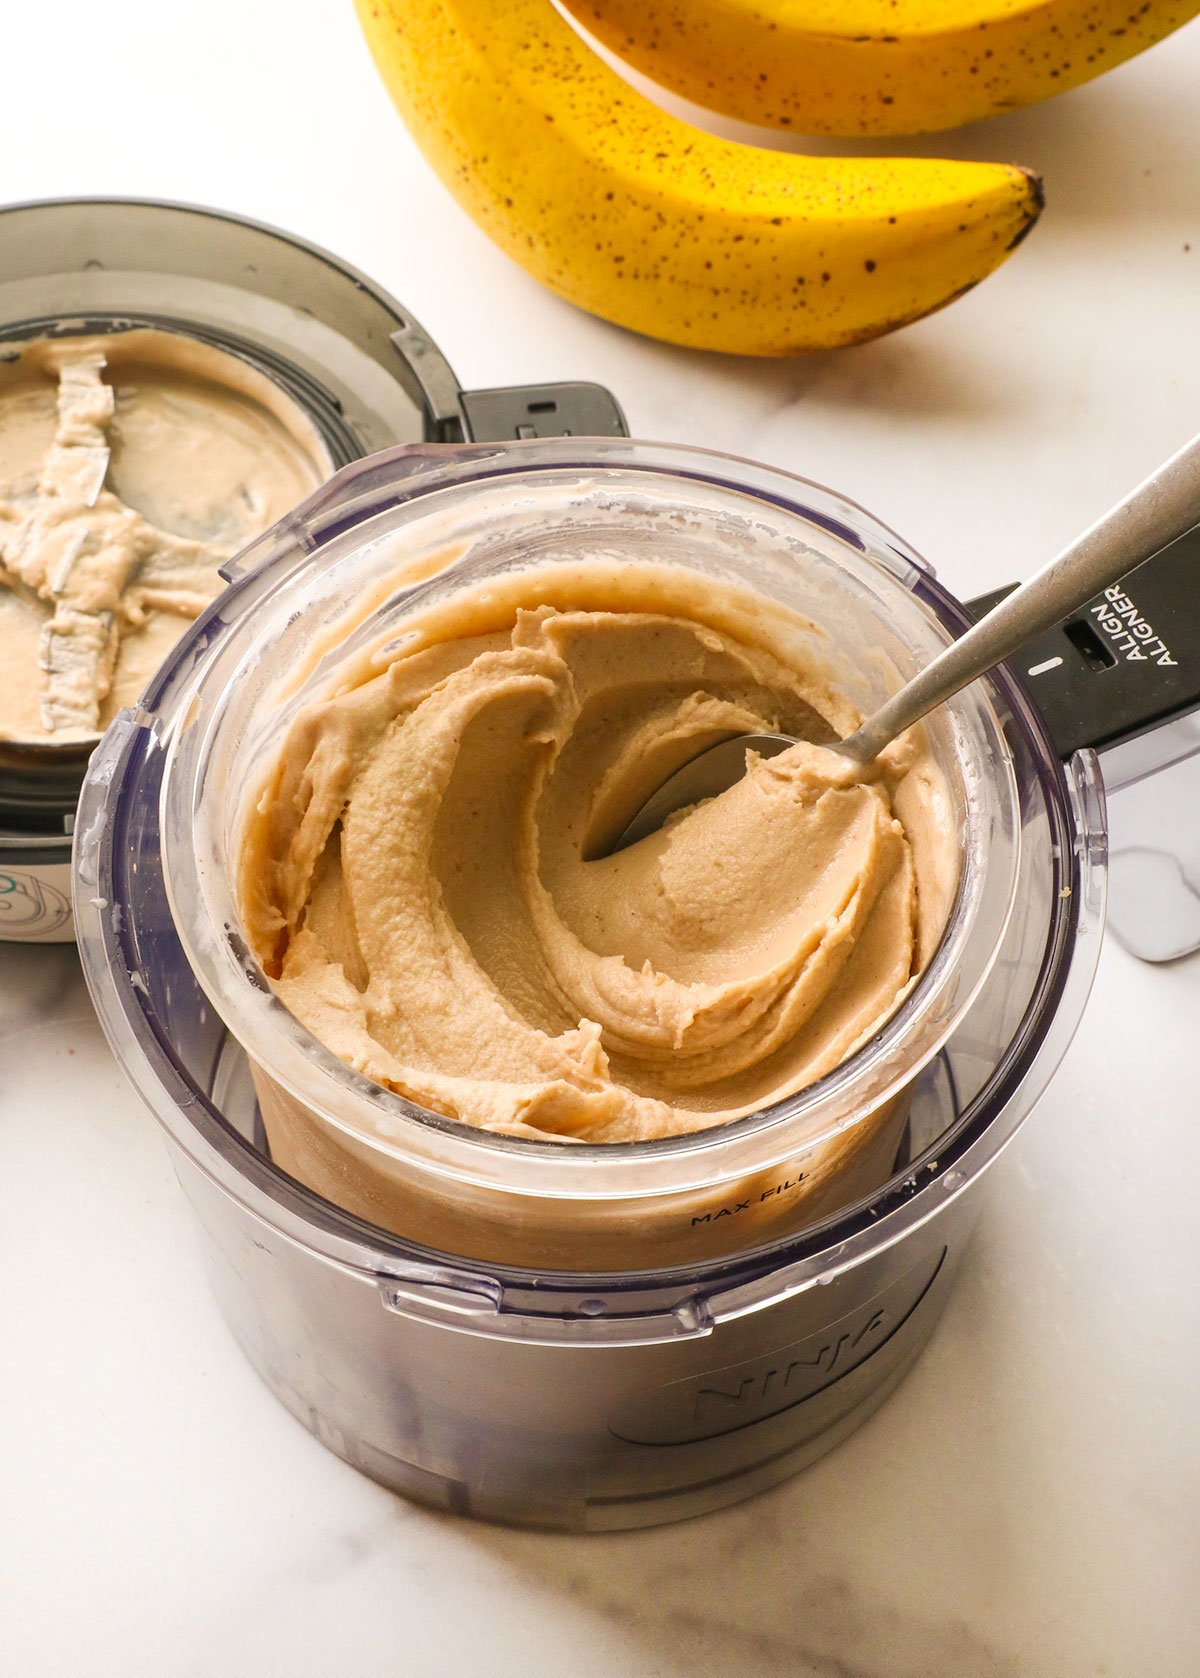
As soon as it’s full, it needs to be considerably creamy. Nonetheless, it can have a greater texture if you happen to run it on the re-spin cycle. (This can be a nice time so as to add your favourite mix-ins, akin to chopped walnuts or different nuts, chocolate chips, or recent fruit.)
After one re-spin, test on the consistency of the ice cream. It needs to be creamy and scoopable. If it’s not, run one other re-spin cycle. When the ice cream has a gap by the middle (see the picture on the precise above), that’s a great signal.
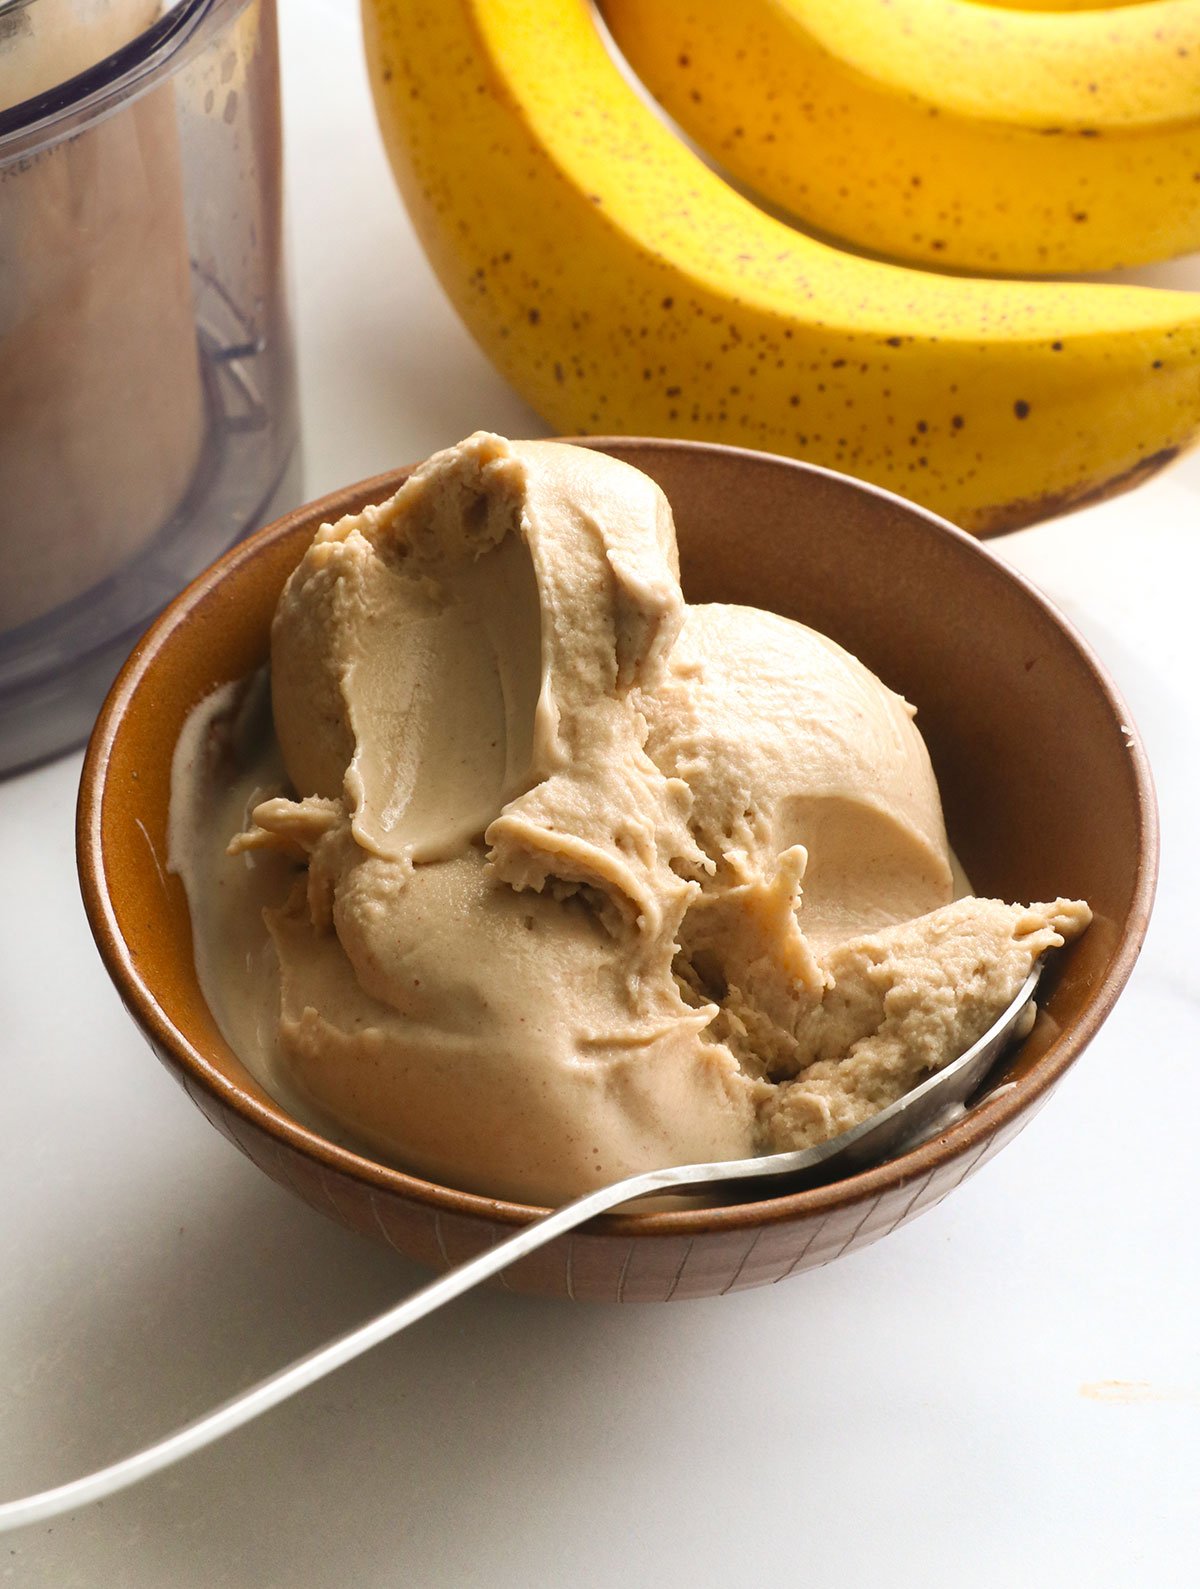
As quickly because the ice cream reaches a texture you’re keen on, it’s able to serve. It has a gentle banana taste and ultra-creamy texture. Prime with a selfmade magic shell for a decadent deal with!
Leftovers could be saved in an hermetic container within the freezer for as much as 3 months. It’s possible you’ll wish to run the re-spin cycle on the Ninja Creami for a softer texture every time you serve it.
Searching for extra Ninja creami recipes? I’ll put up extra quickly, however you’ll be able to course of nearly any ice cream recipe within the Ninja Creami after ready for it to freeze for twenty-four hours.
- 3 ripe bananas
- 3 tablespoons peanut butter
- ½ cup milk of alternative
- ½ teaspoon vanilla extract
-
Take away the peel from the bananas and add them to a high-speed blender, together with the peanut butter, milk, and vanilla extract. Safe the lid and mix till very clean; there needs to be no seen chunks.
-
Pour the blended combination right into a Ninja creami pint container. The combination mustn’t go larger than the “max fill” line. Safe the lid and place the pint container on a flat shelf in your freezer. Let it freeze for twenty-four hours or extra.
-
As soon as the combination is frozen strong, you’ll be able to spin it in your Ninja Creami everytime you’re prepared. (You’ll be able to freeze this for at the very least 1 month, so be happy to prep it as early as you’d wish to.)
-
Take away the lid from the pint container and place it into the outer container with the deal with. Click on the lid, with the blender blade hooked up, into place. Then safe the outer bowl within the Ninja Creami machine. (It is best to hear a click on when it’s appropriately positioned.) Press the Sorbet button to start out the primary cycle.
-
When the cycle is full, the banana ice cream more than likely will not look creamy but. Safe it again into the machine and run a re-spin cycle. This could make it a lot creamier! (You may know it is good when there is a gap within the heart of the ice cream.) If it is nonetheless not as creamy as you need, you’ll be able to run a re-spin cycle a second time.
-
Serve this creamy banana ice cream instantly with any toppings you’re keen on. Flip it right into a sundae with selfmade magic shell and crunchy peanuts on high.
Milk Be aware: I used soy milk when testing this recipe, however almond milk, coconut milk, common milk, or oat milk will even work. (Even water will work; the bananas and nut butter add loads of creaminess.)
Nut Butter Be aware: Peanut butter and banana is a well-liked taste mixture, however you should utilize some other nut or seed butter you’re keen on. If you wish to depart it out, the ice cream will likely be much less creamy.
Energy: 220kcal | Carbohydrates: 32g | Protein: 6g | Fats: 9g | Saturated Fats: 2g | Polyunsaturated Fats: 3g | Monounsaturated Fats: 4g | Sodium: 90mg | Potassium: 569mg | Fiber: 4g | Sugar: 17g | Vitamin A: 230IU | Vitamin C: 13mg | Calcium: 69mg | Iron: 1mg
If you happen to do this Ninja Creami Banana Ice Cream recipe, please depart a remark and star score under, letting me understand how you prefer it.